← Назад

Ввод данных ГИС.

LOG data input.

inlog Интерактивная программа.


Designation

Soluble problems and method

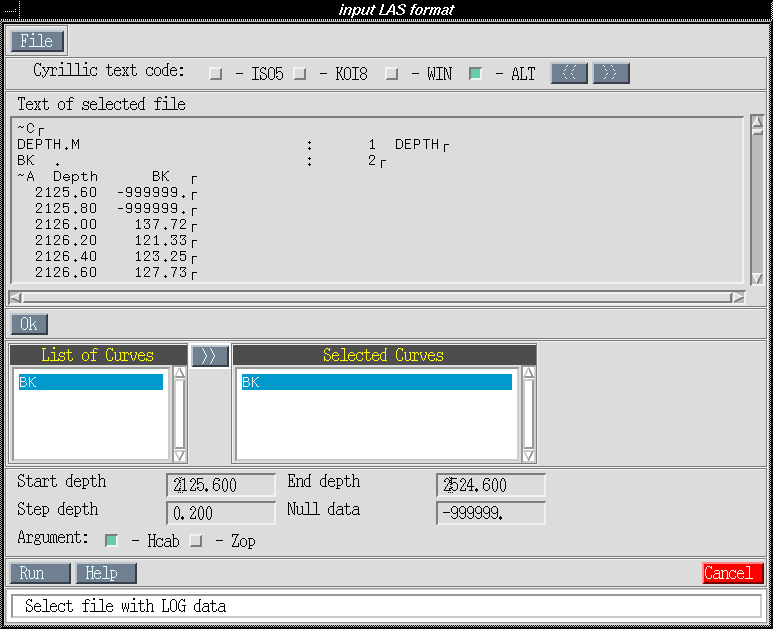
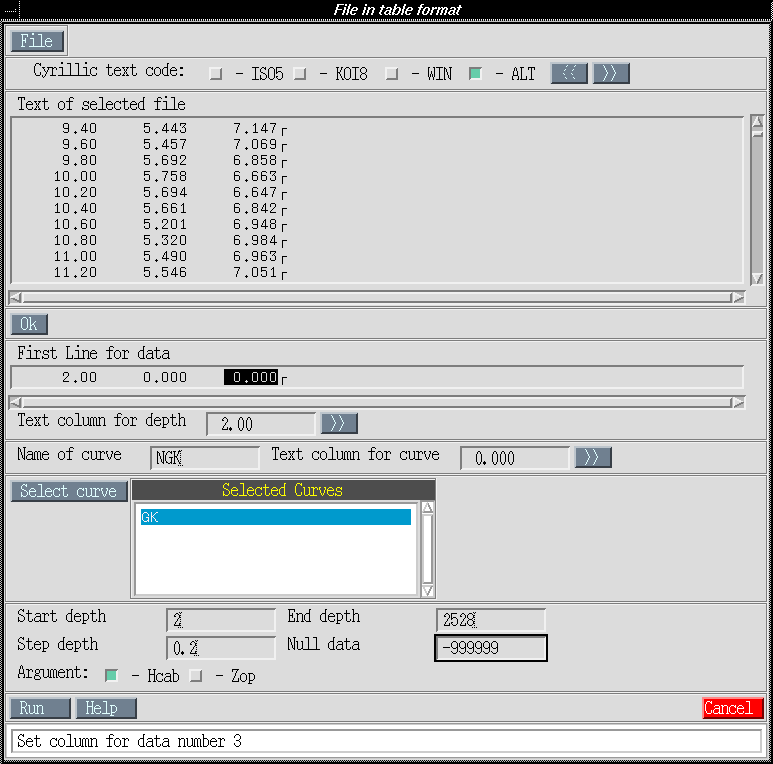
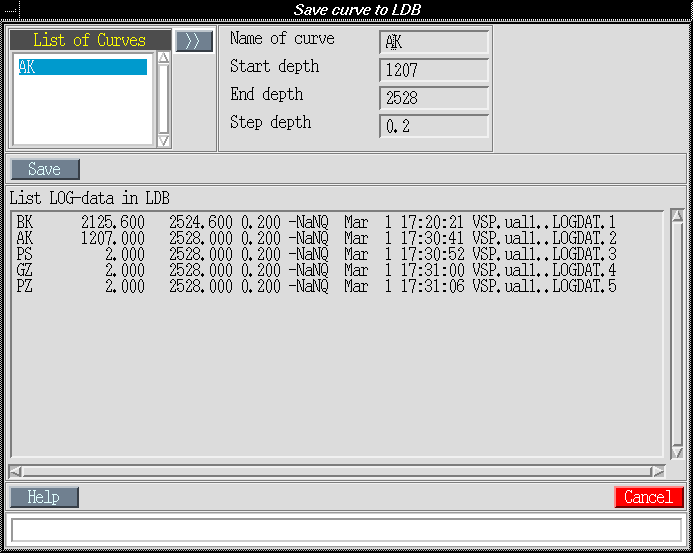
The program for the LOG data input provides the input of the LOG data. The data is represented in files of the LAS format or in text files in the form of tables. After input the data is loaded to the database.

Interaction with other programs

This program prepares LOG data for their subsequent application for interpretation of results of the VSP data.


Description

Session

Session of the program starts with the LOG data input ("File" button). Before the LOG data input all other buttons of the program are unavailable.

User interface

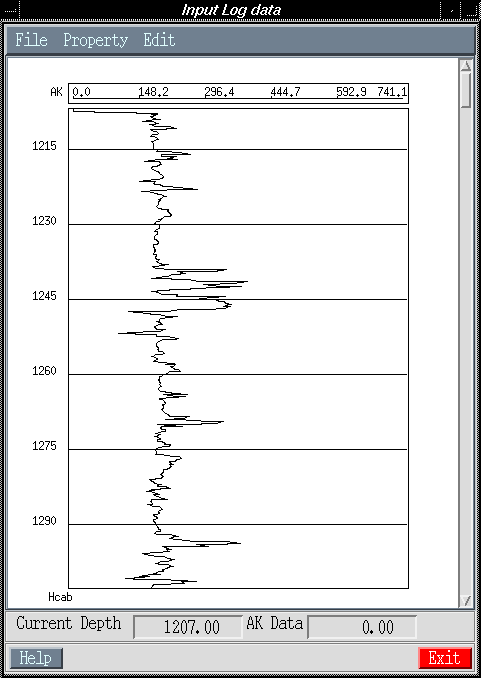
The main window of the program consists of three functionally different areas. At the top of the window the menu is located. All operation of the program is carried out with the help of this menu. At the center of the window the field where the input curves will be drawn is located. In this field the input curves will be drawn. This field has a vertical scrolling bar to see all entered information.

At the bottom the information windows are located, in which the current cable depth of layout of the cursor and the curve value for this depth are specified. At the start of operation of the program this window is hidden. It is possible to switch it by clicking the left mouse button on a scale of a curve, which values are needed to be seen. For switching the window to the other curve it is necessary to click the mouse button on a scale of other curve. Second click on the same scale will result in closing of the window. Below these windows the "Help" button and "Exit" button for program termination are located.


Structure of the menu

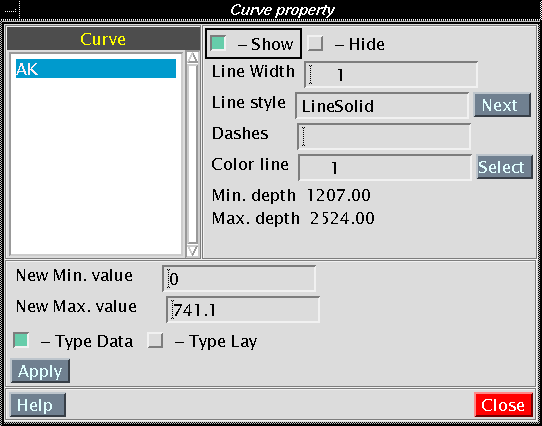
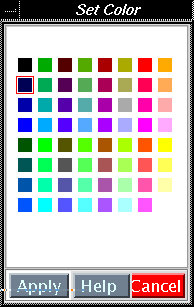
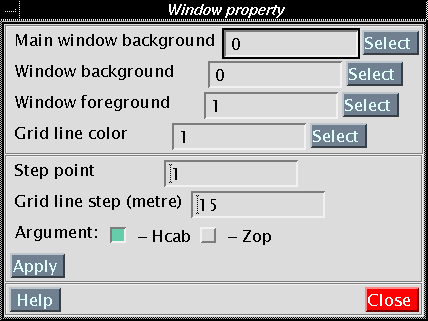
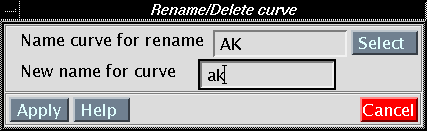
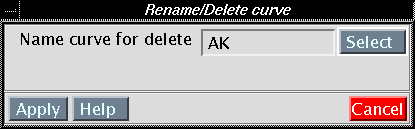
File

Property Edit After pressing each button a dialog box appears. It allows to carry out the selected function.


Menu items

File - > LAS format...
Displays the dialogue input of the LOG data written in the file of the LAS format. The selection of a source file is carried out in the dialog window which is displayed after pressing of the "File" button. The selected file can be seen in the window " Text of selected file ". It is possible to choose the necessary encoding for the file with the help of " Cyrillic text code " buttons. If the necessary file is selected, press "Ok" button.

After pressing this button the earlier unactive windows with the file parameters become active. The information on the selected file will be displayed. In the " List of Curves " window the names of curves which are located in this file will appear. For input of the necessary curves from this file they should be selected. To do it move the cursor of the list to the necessary curve and press the " > > " button. The selected curve should appear in the right list window as " Selected Curve ". After selection of all necessary curves from this file the "Run" button is pressed to start processing of the curves.


File - > ASCII format...
Displays the dialogue for LOG data input. These data is written in a text file in the form of tables. The selection of a source file is carried out in the dialog box which is displayed after pressing of the "File" button. The selected file can be viewed in the window " Text of selected file ". It is possible to choose the necessary encoding for the file with the help of " Cyrillic text code " buttons. If the necessary file is selected, it is necessary to place the mouse cursor on the first line of the table. In this case the "Ok" button becomes accessible. After pressing it the selected line appears in a field " First line for data ".

After pressing this button it is necessary to specify a column of depths, if it is present, and to specify columns of data and assign them names. For this purpose it is necessary to place into them the necessary data from the first string with the help of buttons " > > ", located to the right of appropriate windows. For curves after that it is necessary to specify the name of the curve and to press the " Select curve " button. The name of selected column will appear in the " Selected Curves " list.
    After selection of all curves it is necessary to type the appropriate information on the data:
  • Start depth - start depth
  • End depth - end depth
  • Step depth - step of measurements
  • Null data - number to mark the nonexistent data
The data input will start after pressing the "Run" button.


File - > Save curve...
Displays the dialogue to save the curves in the local database. In the " List of Curves " the list of all entered curves is visualized. For saving the curve cursor in this list is moved to the necessary curve and the button " > > " The data for this curve will appear in the windows at the right side
    The data include:
  • Name of curve - name of a curve
  • Start depth - start depth
  • End depth - end depth
  • Step depth - step of measurement.
It is possible also to change the name of the curve.
The curve is saved to the database after pressing the "Save" button


File - > Exit
Pressing this button results in a program termination.


Property - > Curve...
Pressing this button displays the dialogue for specification and changing of the parameters for visualization of the curve. For this purpose in the left part of the window the list of available curves appears. Selecting the necessary curve in this list allows to change its parameters.

For each curve it is possible to set or to change the following properties:
  • It is possible to visualize (or not) the curve with the help of the buttons "Show" (or "Hide").
  • To set the sort of line: its width, style and colour. The width or style of line are set by changing the contents of appropriate fields in the window. Thus
    • LineSolid - the curve is drawn as a solid line
    • LineOnOffDash - the curve is drawn as a dash line
    • LineDoubleDash - the curve is drawn by a dash line with other colour of intervals. The style LineSolid is set as default.
    • Dashes - list of the number pairs. Each number pair specifies length of a dash and the length of an interval after it. This parameter is necessary if the sort of line is set as LineOnOffDash or LineDoubleDash. The value 8,3 is set as default.
    The colour of a line is set on pressing the "Select" button in the " Color line " window. After it the appropriate dialogue is displayed. To set the colour it is necessary to click the left mouse button on the small square of appropriate colour and to press the "Apply" button in a dialogue window. The actual intervals of a curve are specified in the " Min. depth " and " Max. depth " fields.

  • Changing of minimum and / or maximum values of the drawing scale of the curve will result in shift of a curve along the horizontal axis. If to set an identical scale for different curves, the curves can be compared with each other.
  • Changing the type of representation of the curve. At " Type Data " mode the curve is drawn as a solid line. At " Type Lay " mode the curve is drawn as layers.


Property - > Window...
Pressing this button results in appearance of a dialogue window for setting the window type and curves scaling. The selection of the colour is carried out equally in all cases and is described in the chapter Curve...
It is possible to set the following parameters of the window:
  • Background color of a main window of the program.
  • Background color inside a frame for drawing the curves
  • Colour of a frame for drawing the curves
  • Colour of lines for drawing a scale of depths
  • Step of drawing of the curve. If this parameter is greater than 1, the curve will be drawn on the screen in the extended way. If the negative number will be set for this parameter, the values with the defined step will be selected for drawing and the curve will be drawn in the compressed way.
  • Step of drawing and captions for lines of a scale of depths. Is set in meters.
  • It is possible to change the type of argument of a scale of depths by switching of buttons Hcab or Zop of the Argument parameter.


Edit - > Rename curve...
Displays the dialogue for renaming curves. Selection of a curve for renaming is carried out by pressing of the "Select" button. In the list " List of Curves " the list of all entered curves appears. In this list the cursor should be placed on the necessary curve and the "Ok" button should be pressed. The name of the selected curve will appear in a field " Name curve for rename ". After that it is necessary to specify a new name of a curve in the window " New name for curve ".
The renaming of a curve occurs after pressing the "Apply" button. It is possible to abort renaming by pressing the "Cancel" button.


Edit - > Delete curve...
Displays the dialogue for deleting curves. Selection of a curve for deleting is carried out by pressing of the "Select" button. In the list " List of Curves " the list of all entered curves appears. In this list the cursor should be placed on the necessary curve and the "Ok" button should be pressed. The name of the selected curve will appear in a field " Name curve for delete ".
The deleting of a curve occurs after pressing the "Apply" button. It is possible to abort deleting by pressing the "Cancel" button.

Input data

Passport data

To obtain a well name the table WELLLIST is used.

Other data

The other data are not used by the program.


Output data

Traces

N/A

Data base tables

The program uses for record or creates the following tables:

  • VSP.LOGLIST - to record information about a curve in the database such as "Data". For each curve the information on an interval of a curve, step of measurement, value of missing number and date of recording of a curve to the database is provided.
  • VSP.LOG.. LOGDAT.n - to record curves to the database. Each curve is written in the separate table.

Messages to the user

Bringing messages to the notice of the user

When the program is started, the presence of files setup, .sdscolor is checked and in the case of their absence the program outputs the appropriate message on the terminal. After the program start all messages are output to the information line, which is located at the bottom of the dialog boxes. The information on some errors is displayed in the terminal from which the program was started.

Description of the information messages

The messages output to the terminal:

N/A

The messages output in information line:

" Error: Selected curve missing "
There is no selected curve
" WELLIST table missing "
There is no data base table VSP.WELLLIST
" WELLIST table is empty "
The table VSP.WELLLIST does not contain lines of the data
" Error for open table LOGLIST "
Error at opening a data base table with a name VSP.LOGLIST
" Error for open table MOD1DLIST "
Error at opening a data base table with a name VSP.MOD1DLIST

7.3. Description of the diagnostic messages

The messages output to the terminal:

" FATAL: Error read file. "
The error in opening of the file or the file has zero size
" FATAL: Error in pos = xx. File is not format LAS "
Error in a column... The file is not saved in the LAS-format
" Set parametrs STRT, STOP, STEP or NULL "
At table creation the following fields are not filled
  • Start depth - start depth
  • End depth - end depth
  • Step depth - step of measurements
  • Null data - number to mark the nonexistent data
" Parametr Hstep equal NULL "
The parameter Step depth is equal zero
" Parametr Hmin great Hmax "
The parameter Start depth is greater than the parameter End depth when the value of the parameter Step depth is more than zero
" Parametr Hstep less Null "
The parameter Step depth is less than zero when the value of the parameter End depth is greater than the parameter Start depth

Contacts
43, Zaitseva st., room 263, Saint Petersburg, 198188, Russia
Phone:
+7 (495) 754-9990
+7 (903) 255-7275
+7 (911) 236-7708
e-mail:
vsp@geovers.com
© 2001-2024 GEOVERS Ltd.